Adding Destination Servers
 Before uploading files, you must provide details about the destination ExpeDat server. Clicking on the
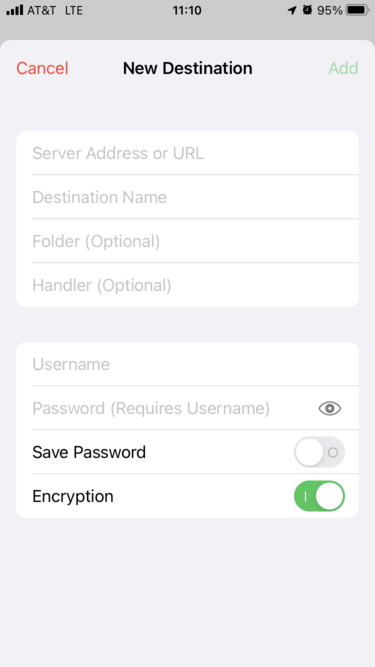
  New Destination button or clicking a new expedat:// URL will open the server dialog shown to the right.
If you clicked on a URL, then the required information should be auto-filled into the form and you will only need to provide a name and possibly a password. You may also paste a URL into the Server Address field instead of clicking the URL in a browser.
- Server Address or URL
- The DNS name or IP address of the ExpeDat server, including the port number if it is non-standard. For example, "example.com:8080". You may also paste an expedat:// URL here, in which case the URL will be unpacked and used to fill in other blank portions of the form. Host groups are not yet supported, the destination must be a single server.
- Destination Name
- Your own label for the server, which will later be displayed in the "Destinations" menu.
- Folder (Optional)
- The path to the folder on the server where files will be uploaded. Remember that ExpeDat servers always use forward slashes ('/') to delimit path names. Leave this blank to deliver files to the default/home directory. See the Home Directories section of the server documentation for details.
- Handler (Optional)
- Leave this blank for regular file uploads. If the server has been configured to accept data for an Object Handler, enter the Object Handler's action code here. For example, if you are uploading to a CloudDat for Amazon S3, enter "S3".
- Username
- If the server requires authentication, enter the username here. When targeting a Windows server, you may specify an Active Directory name as "username@ad_domain".
- Password
- When authenticating with a username, enter the matching password here. Click the eye icon to make the password visible.
- Save Password
- Enable this switch to store your password for future use. Otherwise you will be prompted to enter your password each time you begin an upload.
- Encryption
- Enable this switch for AES encryption of file contents while in transit. Unless your server does not support encryption, you should leave this on.
Once you have entered all of the required information, click the Add button to save the destination. You may then be prompted to begin an upload.
A destination can be edited or deleted by swiping left on its entry in the Destinations window.